Webforms server setup
Overview
This guide walks you through setting up the mXrap Webforms Server, which enables field teams to submit inspection reports and data collected offline through a web-based interface. The setup process covers basic installation, testing, and optional advanced configuration to run the server as a Windows service.
Prerequisites
Before starting, ensure you have:
- Access to the mXrap root folder (typically located on a network share)
- Windows machine with appropriate permissions to install software and manage services
- Administrator privileges on the machine where you're installing the server
- Network connectivity to the mXrap root folder location
Basic Setup
Step 1: Download and Install mXrap Webforms Server
-
Download the latest
mXrap-Webforms-latest.msiinstaller file from Downloads -
Run the .msi file to begin installation

- Choose your installation scope:
- Current user only (default): Installs to
%LocalAppData% - All users: Recommended if you plan to run as a service - installs to
Program Files
- Current user only (default): Installs to
Step 2: Ensure Root Folder Access
Verify that you have access to the mXrap root folder. This folder typically resides on a network share and contains all the webforms data and configuration.
If the root folder is on a network share, ensure you have the necessary credentials and network connectivity before proceeding.
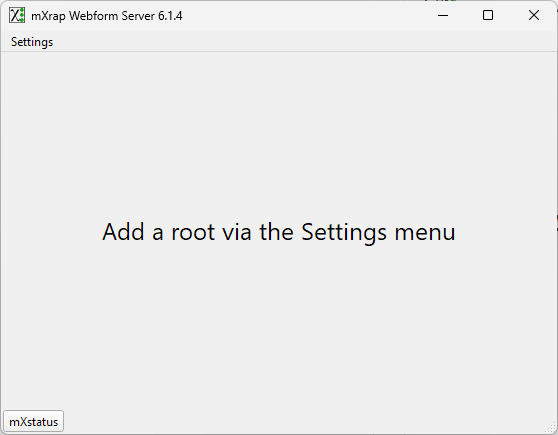
Step 3: Run the mXrap Webforms Server Program
- Open the Start Menu and search for mXrap Webforms Server

-
Click to launch the program
-
The program window should open, initially showing an empty server list
Step 4: Add Root Folder to Server List
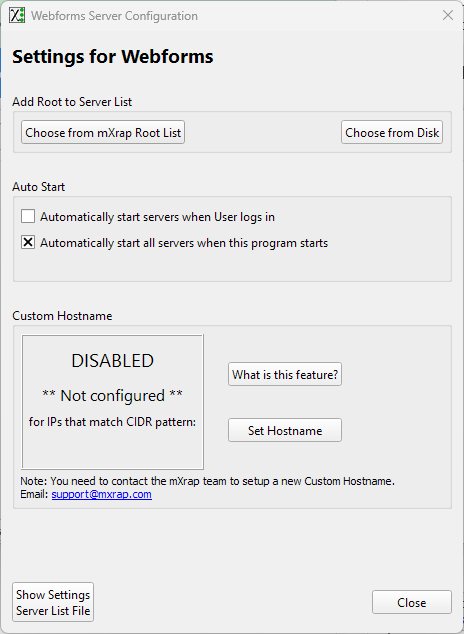
-
Click Settings in the menu bar
-
Select Edit Common Settings
-
Under the Add Root to Server List section, click Choose from Disk
-
Navigate to and select your mXrap root folder
-
Click OK to confirm
Step 5: Configure Custom Hostname (Optional)
If your site uses a custom hostname:
-
Go to Settings → Edit Common Settings
-
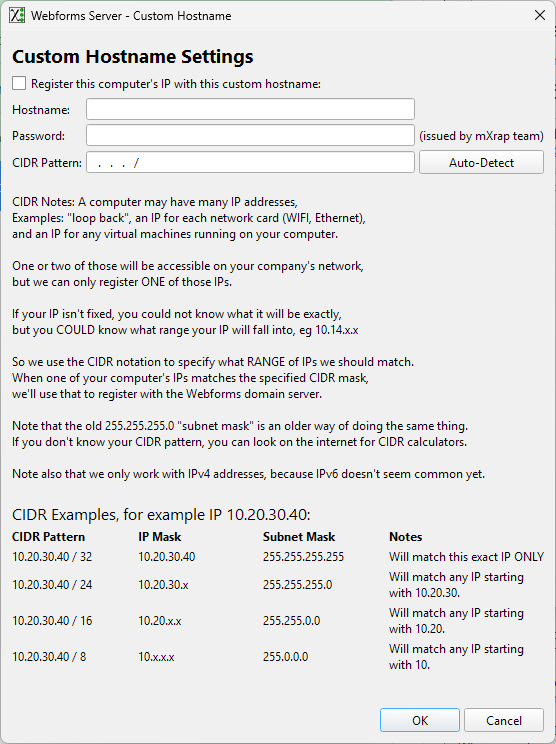
In the Custom Hostname section, click Set Hostname
-
Enter your hostname and password settings (contact support if you need these details)
-
For the CIDR pattern, you can typically use Auto-Detect to automatically identify the correct network interface
Step 6: Verify Server Status
-
Close the settings dialog if it's still open
-
You should now see your root folder listed on the main screen
-
The server will start up (this may take a moment) and the status will change to Running
-
Once running, you'll see URLs for each network interface on your machine
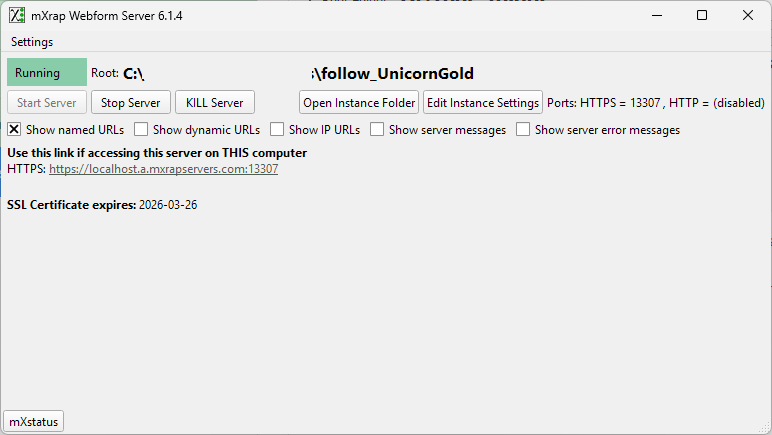
- Click one of the URLs to open it in your browser and verify:
- The server is running correctly
- The root folder is properly selected
- The webforms apps are installed and visible

Testing
Step 7: Test the Inspections Webform
-
Click on the Inspections link from the webforms app list
-
If a popup appears indicating a new version is available, click OK to update
-
The inspections webform should load successfully
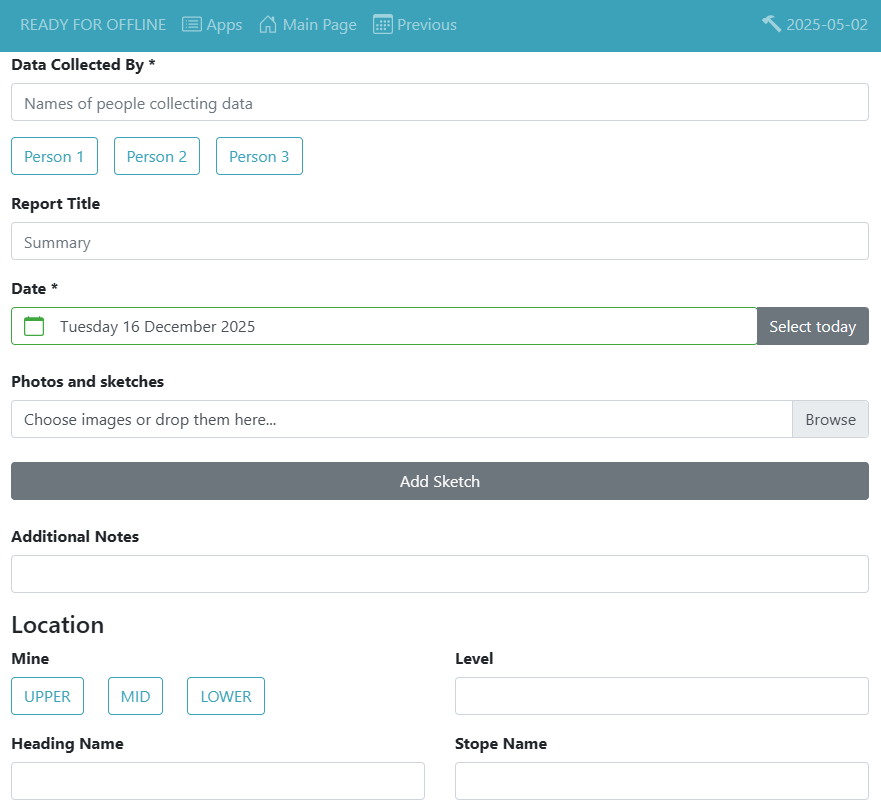
Step 8: Submit a Test Report
To verify that report submission is working:
-
In the Data Collected By field, enter:
test -
In the Report Title/Summary field, enter:
test -
Scroll down to the bottom of the form
-
Click Close Report Details
-
If a popup warns about mandatory fields, click Yes to proceed
-
If a second screen appears with a Submit Report button, click it
-
The webpage should return to the original screen and show a message confirming successful submission.
- Verify that the status shows "0 reports pending" in the top-left corner
Running as a Service
This section is optional and recommended only if you want the webforms server to:
- Run on a dedicated server
- Start automatically when the machine boots
- Run continuously without user login
- Be managed through Windows Services
Prerequisites for Service Setup
Before proceeding with service setup, ensure:
- The basic setup is working correctly
- You have administrator privileges on the machine
- You understand Windows Services management
- The mXrap Webforms Server is currently not running (close it before proceeding)
Step 1: Download WinSW
WinSW is a wrapper program that allows running other applications as Windows services.
-
Download WinSW from: https://github.com/winsw/winsw/releases/latest
-
Choose the appropriate version:
- WinSW.x64.exe - For 64-bit Windows (recommended)
- .NET variants - Smaller, but require .NET runtime installed
-
Create a directory for the service files (e.g.,
D:\webforms-service\) -
Place the downloaded executable in this directory
-
Rename it to:
webforms-sw.exe
Step 2: Configure Service Wrapper
-
Download the Webforms Service Wrapper Configuration file
-
Extract it into the same directory as
webforms-sw.exe -
You should now have:
D:\webforms-service\webforms-sw.xml
The .exe and .xml files must have the same name (before the extension) and be in the same folder. This is how the executable finds its configuration.
Step 3: Update Configuration File
The webforms-sw.xml file contains default values that need to be customised for your site:
- Open the mXrap Webforms Server program
- Click Show server messages to enable message logging
- Scroll to the top of the message window and find:
******** Starting Program ******** - The lines following
Command line used:show the values you need - Edit
webforms-sw.xmland update these entries:
| Entry | Data needed |
|---|---|
<executable> | Path to mXrap Webforms Server executable (if installed for current user only) |
-Dapp.ssl.key.password | SSL key password |
-Dapp.server.location | Root folder server location |
-Dapp.json.location | JSON data location |
-Dapp.files.location | Files location |
-Dapp.register.custom.hostname.prefix | Custom hostname prefix (if applicable) |
-Dapp.register.custom.hostname.server.salt | Hostname salt (if applicable) |
-Dapp.register.custom.hostname.cidr | CIDR pattern (if applicable) |
-Dserver.ssl.key-store | SSL keystore path (if installed for current user only) |
<workingdirectory> | Should be the directory containing webforms-sw.exe |
Many argument values don't need to be changed from the sample file. Focus on entries containing file/directory paths and hostname-related settings.
Step 4: Verify Path Formats
If your root folder is on a network share, ensure paths are in the correct format:
-
app.server.location: Use file:// format- Example:
file://server/root_folder/webforms/instance/server/
- Example:
-
app.json.locationandapp.files.location: Use UNC paths- Example:
\\server\root_folder\webforms\instance\json\
- Example:
Step 5: Install the Service
- Important: Ensure the mXrap Webforms Server program is not running
- Open Command Prompt and navigate to the directory containing
webforms-sw.exe - Run the installation command:
webforms-sw.exe install - The service should now be installed and visible in Windows Services
- You can manage it through:
- Windows Services app - Right-click to start/stop
- Command line:
webforms-sw.exe start
webforms-sw.exe stop
Log Files
Log files are created in the same directory as webforms-sw.exe:
webforms-sw.out.log- Standard outputwebforms-sw.err.log- Error messageswebforms-sw.wrapper.log- Wrapper-specific messages
Step 6: Configure Service Credentials
If the root folder is on a network share requiring authentication:
- Log in as the local user account that will run the service
- Open Credential Manager
- Click Add a Windows Credential
- Enter:
- Internet or network address: Server address
- Username: Network credentials
- Password: Network password
- Click OK
- Open Windows Services (services.msc)
- Right-click on mXrap Webforms Server → Properties
- Go to the Log On tab
- Select This account and enter the service user credentials
- Click Apply → OK
- If the service is running, stop it and restart it for changes to take effect
Step 7: Verify Service Installation
- Check the log files in the service directory:
- Look in
webforms-sw.out.logfor:"OK, I'm ready now!" - Check
webforms-sw.err.logfor any error messages
- Look in
- Open the inspections webform in your browser
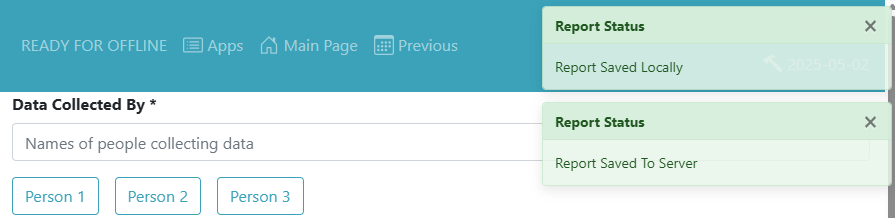
- Verify the status shows:
- "submit now" - Ready to submit reports
- "READY FOR OFFLINE" - Offline capability enabled
If the page shows "offline" instead of "submit now", the page may be loaded from browser cache. Clear your browser cache and reload.
Troubleshooting
Webpage is Inaccessible
Symptoms: Cannot access the webforms server URL in your browser
Diagnostic Steps:
- Verify the mXrap Webforms Server program is running (check the main window)
- Check network connectivity to the machine hosting the server
- Verify the root folder path is correctly configured in the server settings
- Check Windows Firewall settings - the server may need port access
- Try accessing from a different machine on the network
- Check the server messages window for any error messages
Resolution: If the issue persists, please email and ask to schedule a meeting so we can diagnose the issue.
Web Apps Not Visible
Symptoms: The webforms app list is empty or shows no applications
Causes: The root folder doesn't have webforms apps installed
Resolution Steps:
- Perform a default backup of the root folder
- email and request the desired apps to be added to your root folder
- Provide details about which apps you need (e.g., Inspections)
Inspections Webform Loading Issues
Symptoms: The inspections webform doesn't load or displays errors
Diagnostic Steps:
- Verify you're using a supported browser:
- Chrome (latest version)
- Firefox (latest version)
- Edge (Chromium-based, version 79+)
- Clear your browser cache and cookies
- Try accessing from a different browser
- Check the browser console for JavaScript errors (F12 → Console tab)
- Verify the server is showing "Running" status
Resolution: If the issue persists, please email and ask to schedule a meeting so we can diagnose the issue.
Test Report Submission Failed
Symptoms: Test report doesn't submit or returns an error
Diagnostic Steps:
- Verify the form is fully loaded before submitting
- Check that all mandatory fields are completed
- Verify network connectivity to the server
- Check the browser console for error messages
- Try submitting from a different machine
- Verify the root folder has write permissions
Resolution: If the issue persists, please email and ask to schedule a meeting so we can diagnose the issue.
Service Installation Issues
Symptoms: Service fails to install or start, or shows errors
Diagnostic Steps:
- Check
webforms-sw.err.logfor specific error messages - Check
webforms-sw.wrapper.logfor wrapper-related errors - Verify the mXrap Webforms Server program is not running
- Verify the XML configuration file has correct paths
- Ensure the service user has access to the root folder
- Check that the .exe and .xml files have matching names
- Verify the working directory path is correct
Common Issues
Port already in use
Another instance of the server is running. Stop the mXrap Webforms Server program.
Path not found
Verify all paths in the XML file are correct and accessible
Access denied
Ensure the service user has credentials stored in Credential Manager for network shares
Network path issues
For network shares, use file:// and UNC paths as specified in Step 4
If the issue persists, send the following files to ):
webforms-sw.err.logwebforms-sw.wrapper.logwebforms-sw.xml(configuration file)
Next Steps
Once your webforms server is successfully set up and tested:
- Communicate access details to your field teams with the webforms server URL
- Train users on how to access and use the inspections webform
- Monitor submissions regularly to ensure reports are being submitted successfully
- Set up backups for your root folder to protect webforms data
- Plan for maintenance - schedule regular updates and backups